How to Send and Receive Data from External Sources
Automating the data retrieval process has become even easier with API requests. You can request data about the information your user is interested in, create a customer profile, or register for an event in external systems. In response, you receive information that you can display directly in a message to the user or save it to a chatbot variable.
How to Send a Data Request
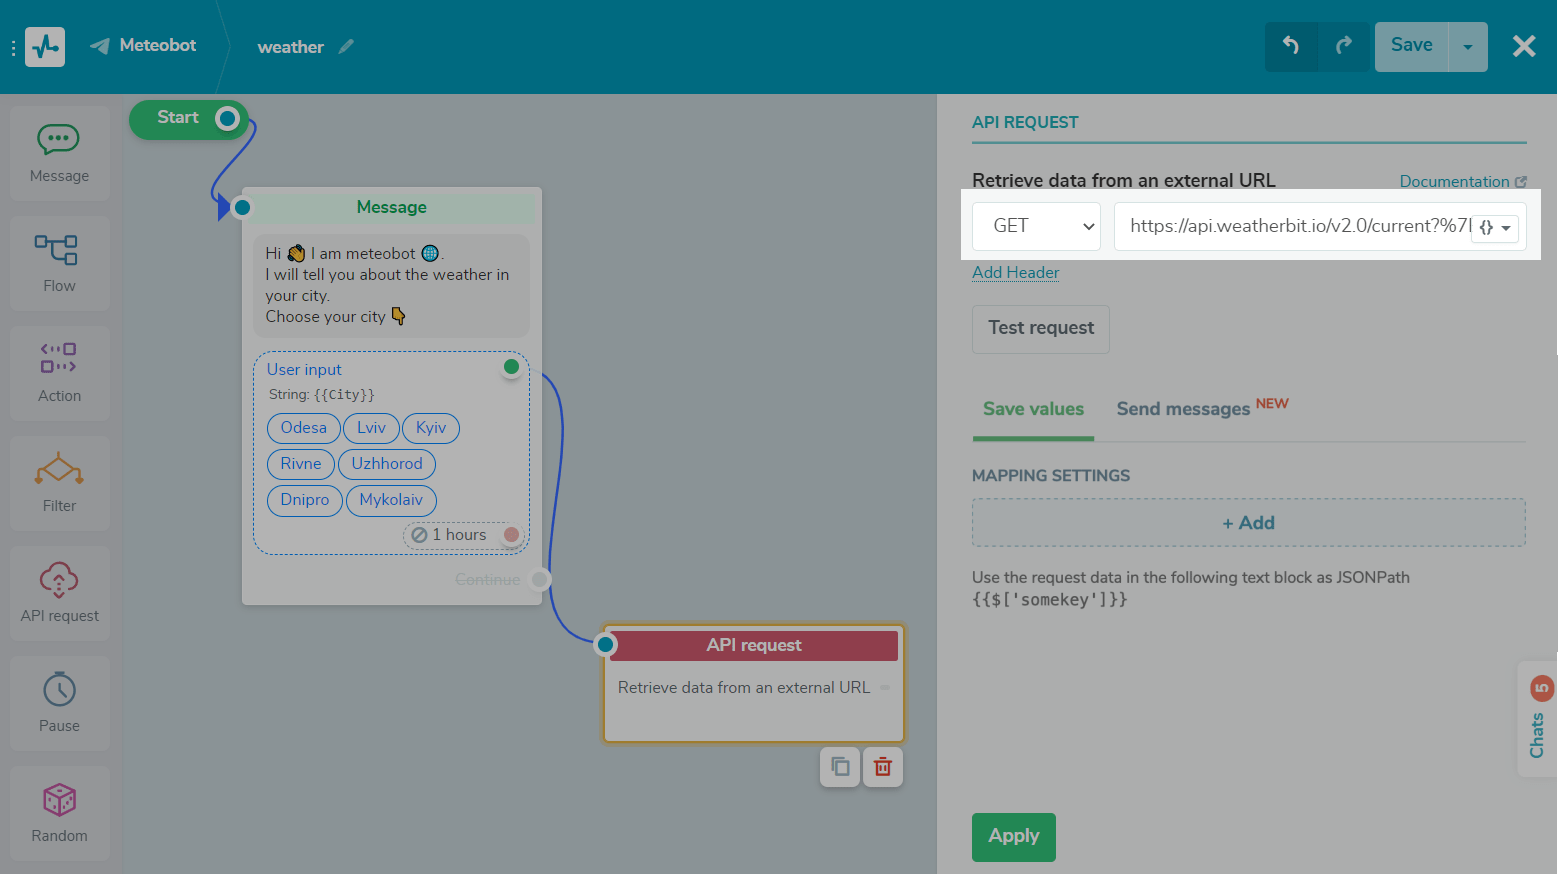
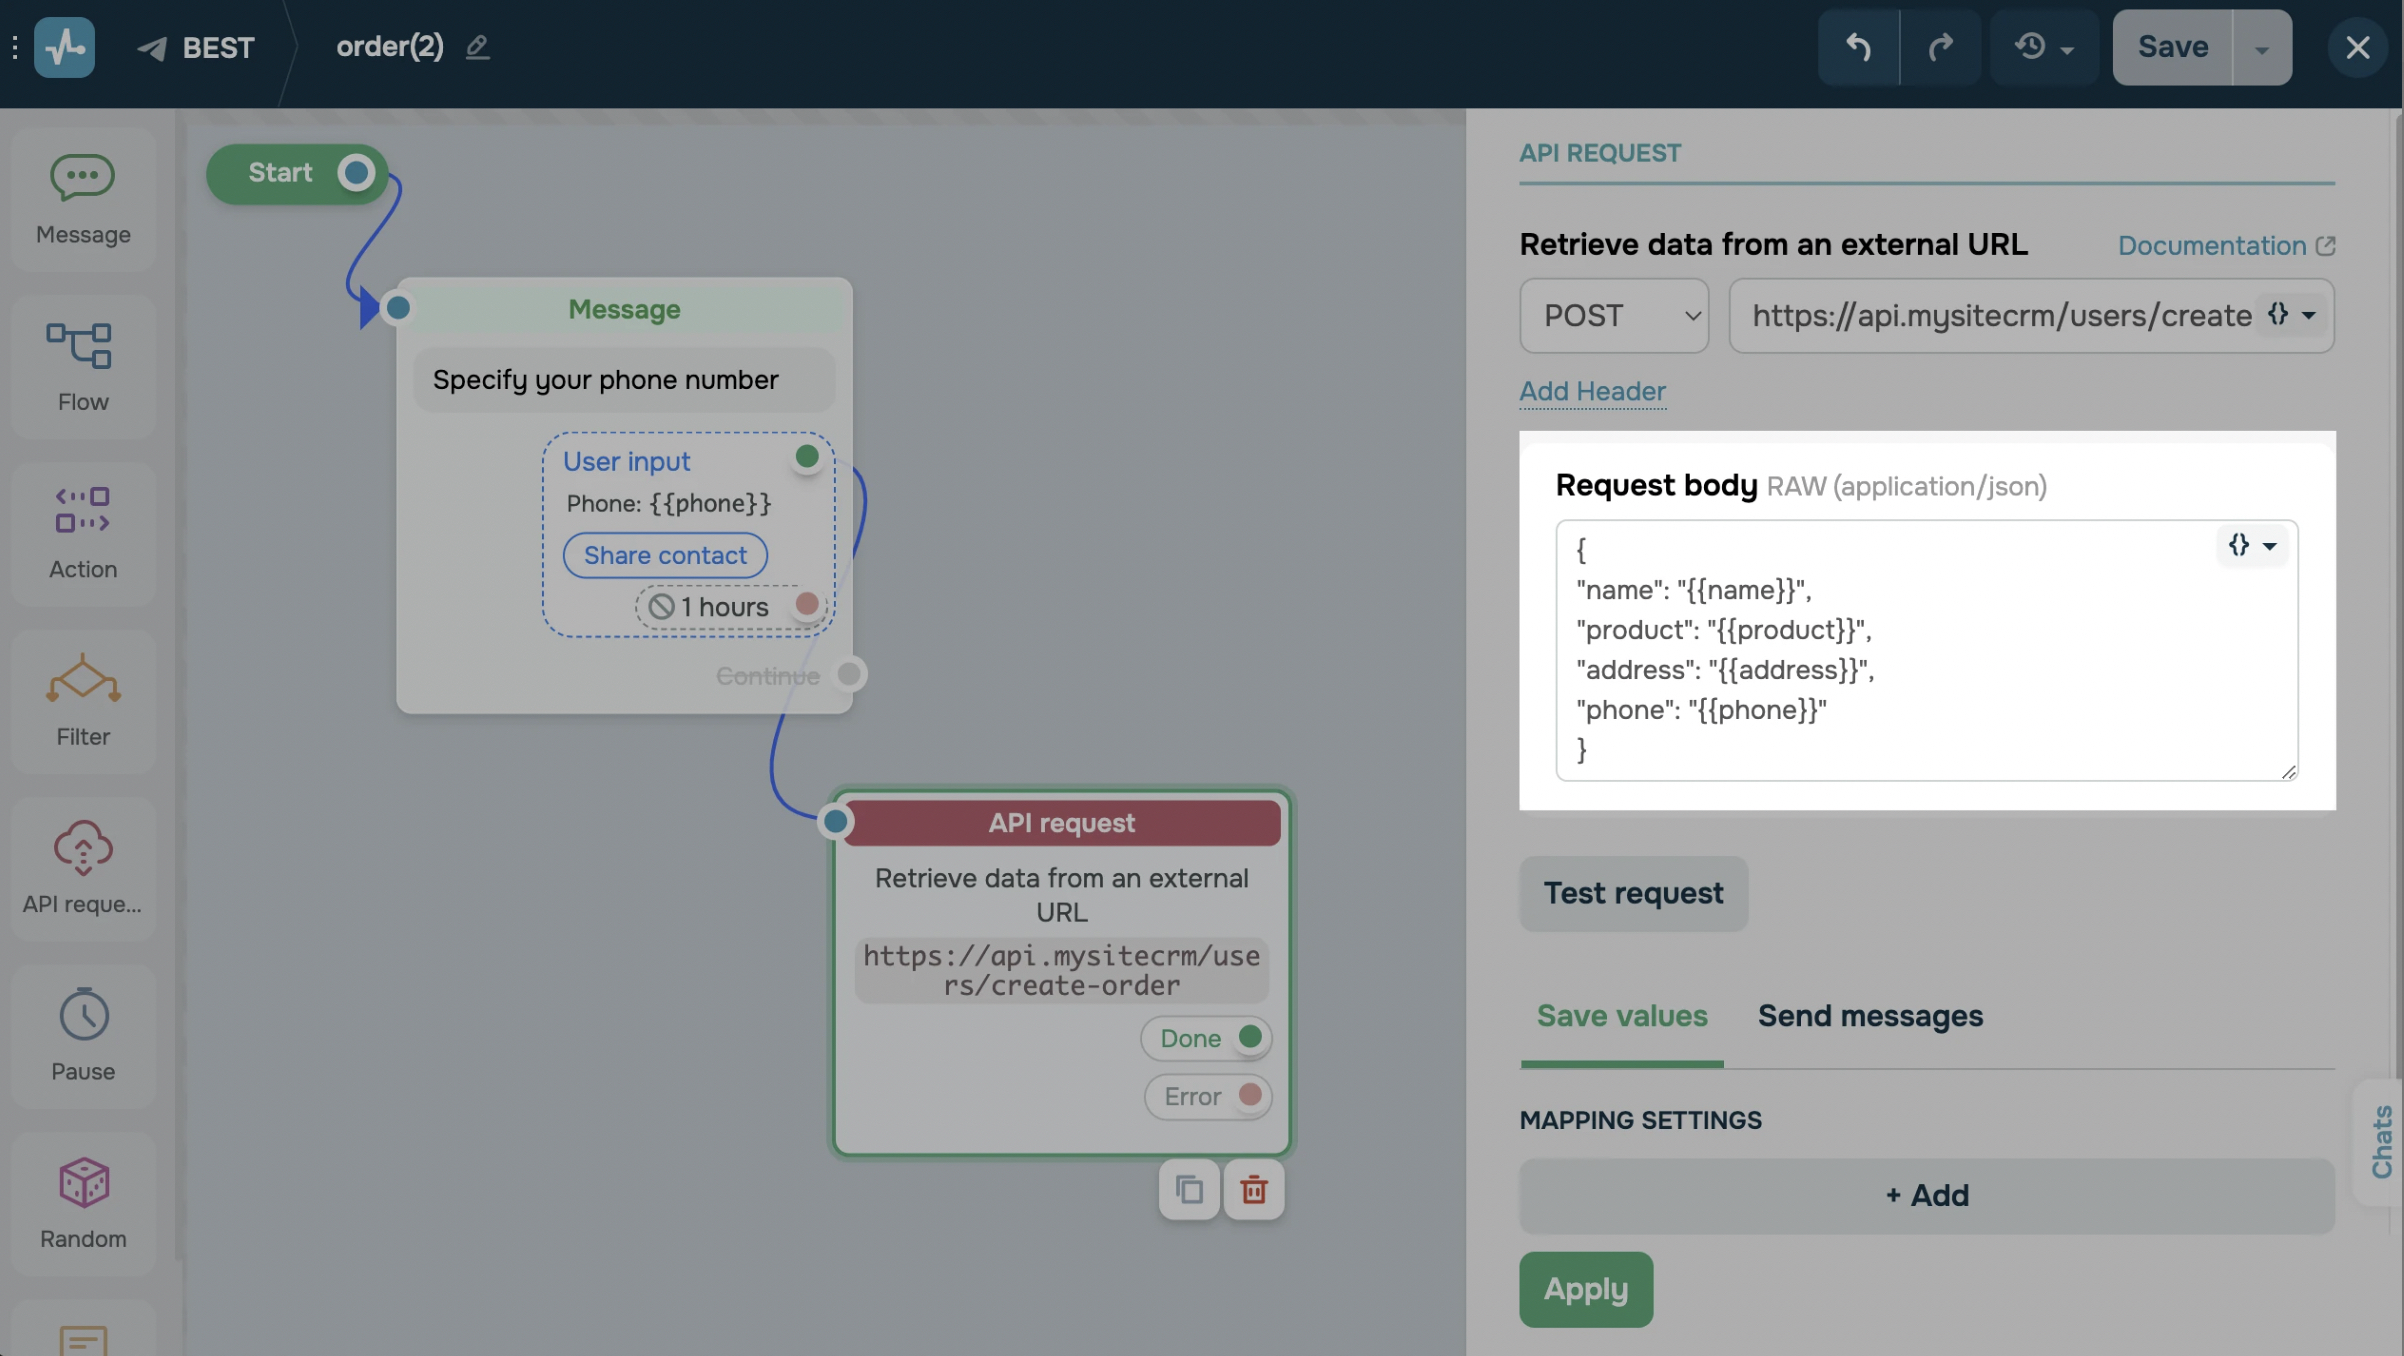
Drag the "API Request" element to the workspace, connect it to the element, after which, you want to get information.
Select the type of request:
- A GET request is usually used to get existing data;
- A POST request is usually used to create a new object in the system and obtain information about it.
Enter the URL to send the request to. You can use your chatbotcustomandglobalvariables in the request.
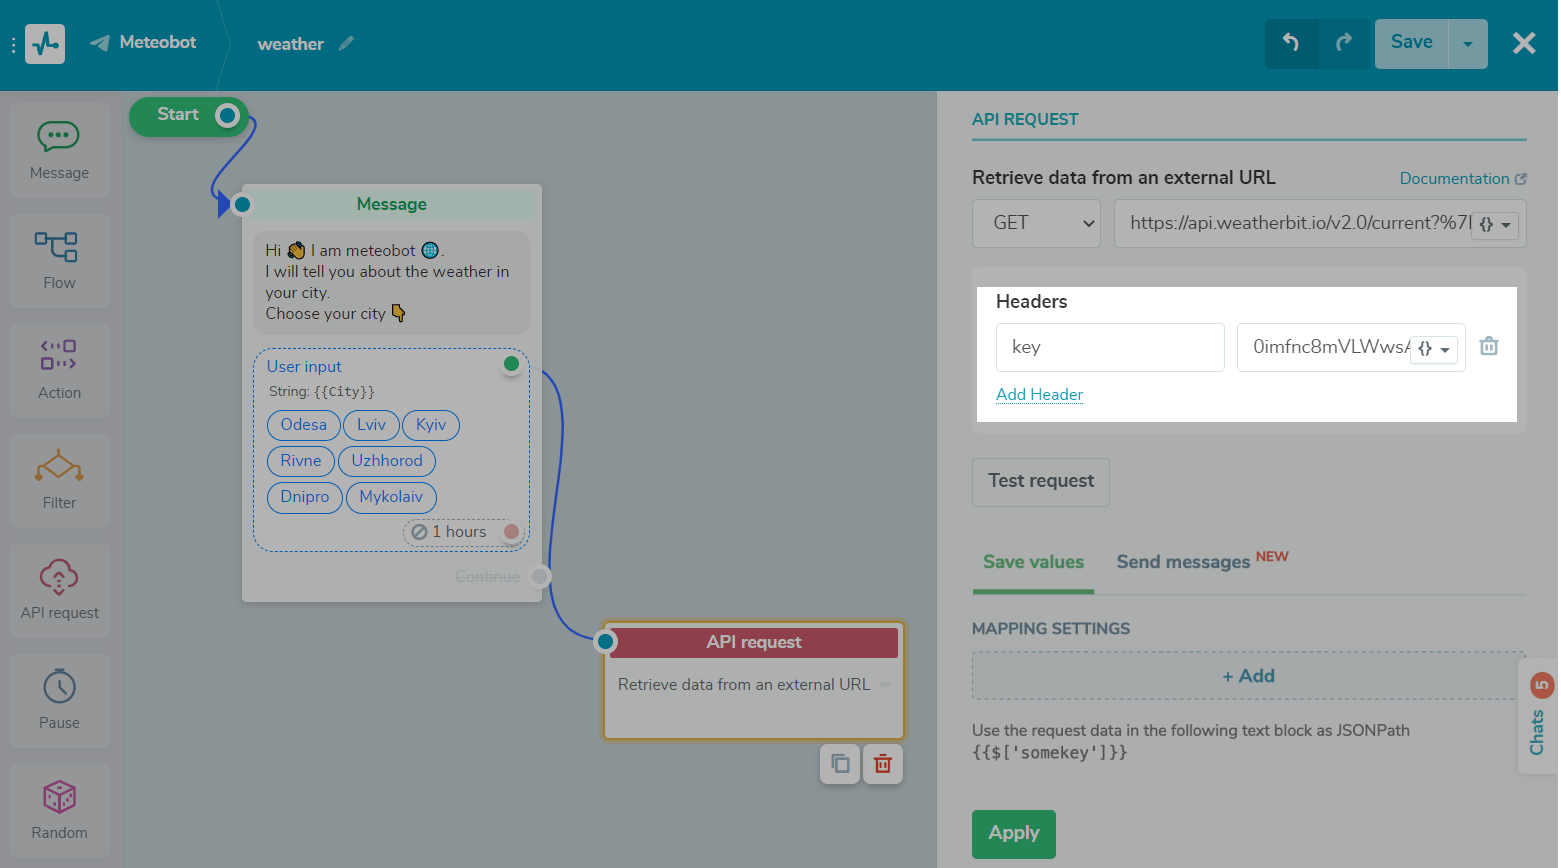
You can add request headers, for example, to authorize requests. You can also use bot variables in request headers.
If you are using a POST request, in the required field enter the request body in JSON with parameters.
Click on "Test Request" to check the submission of the data. Also, this test is useful for data recognition for the next settings.
How to Use the Received Data
If the request is successful, you will receive a response body, and the user will go to the “Done” branch.
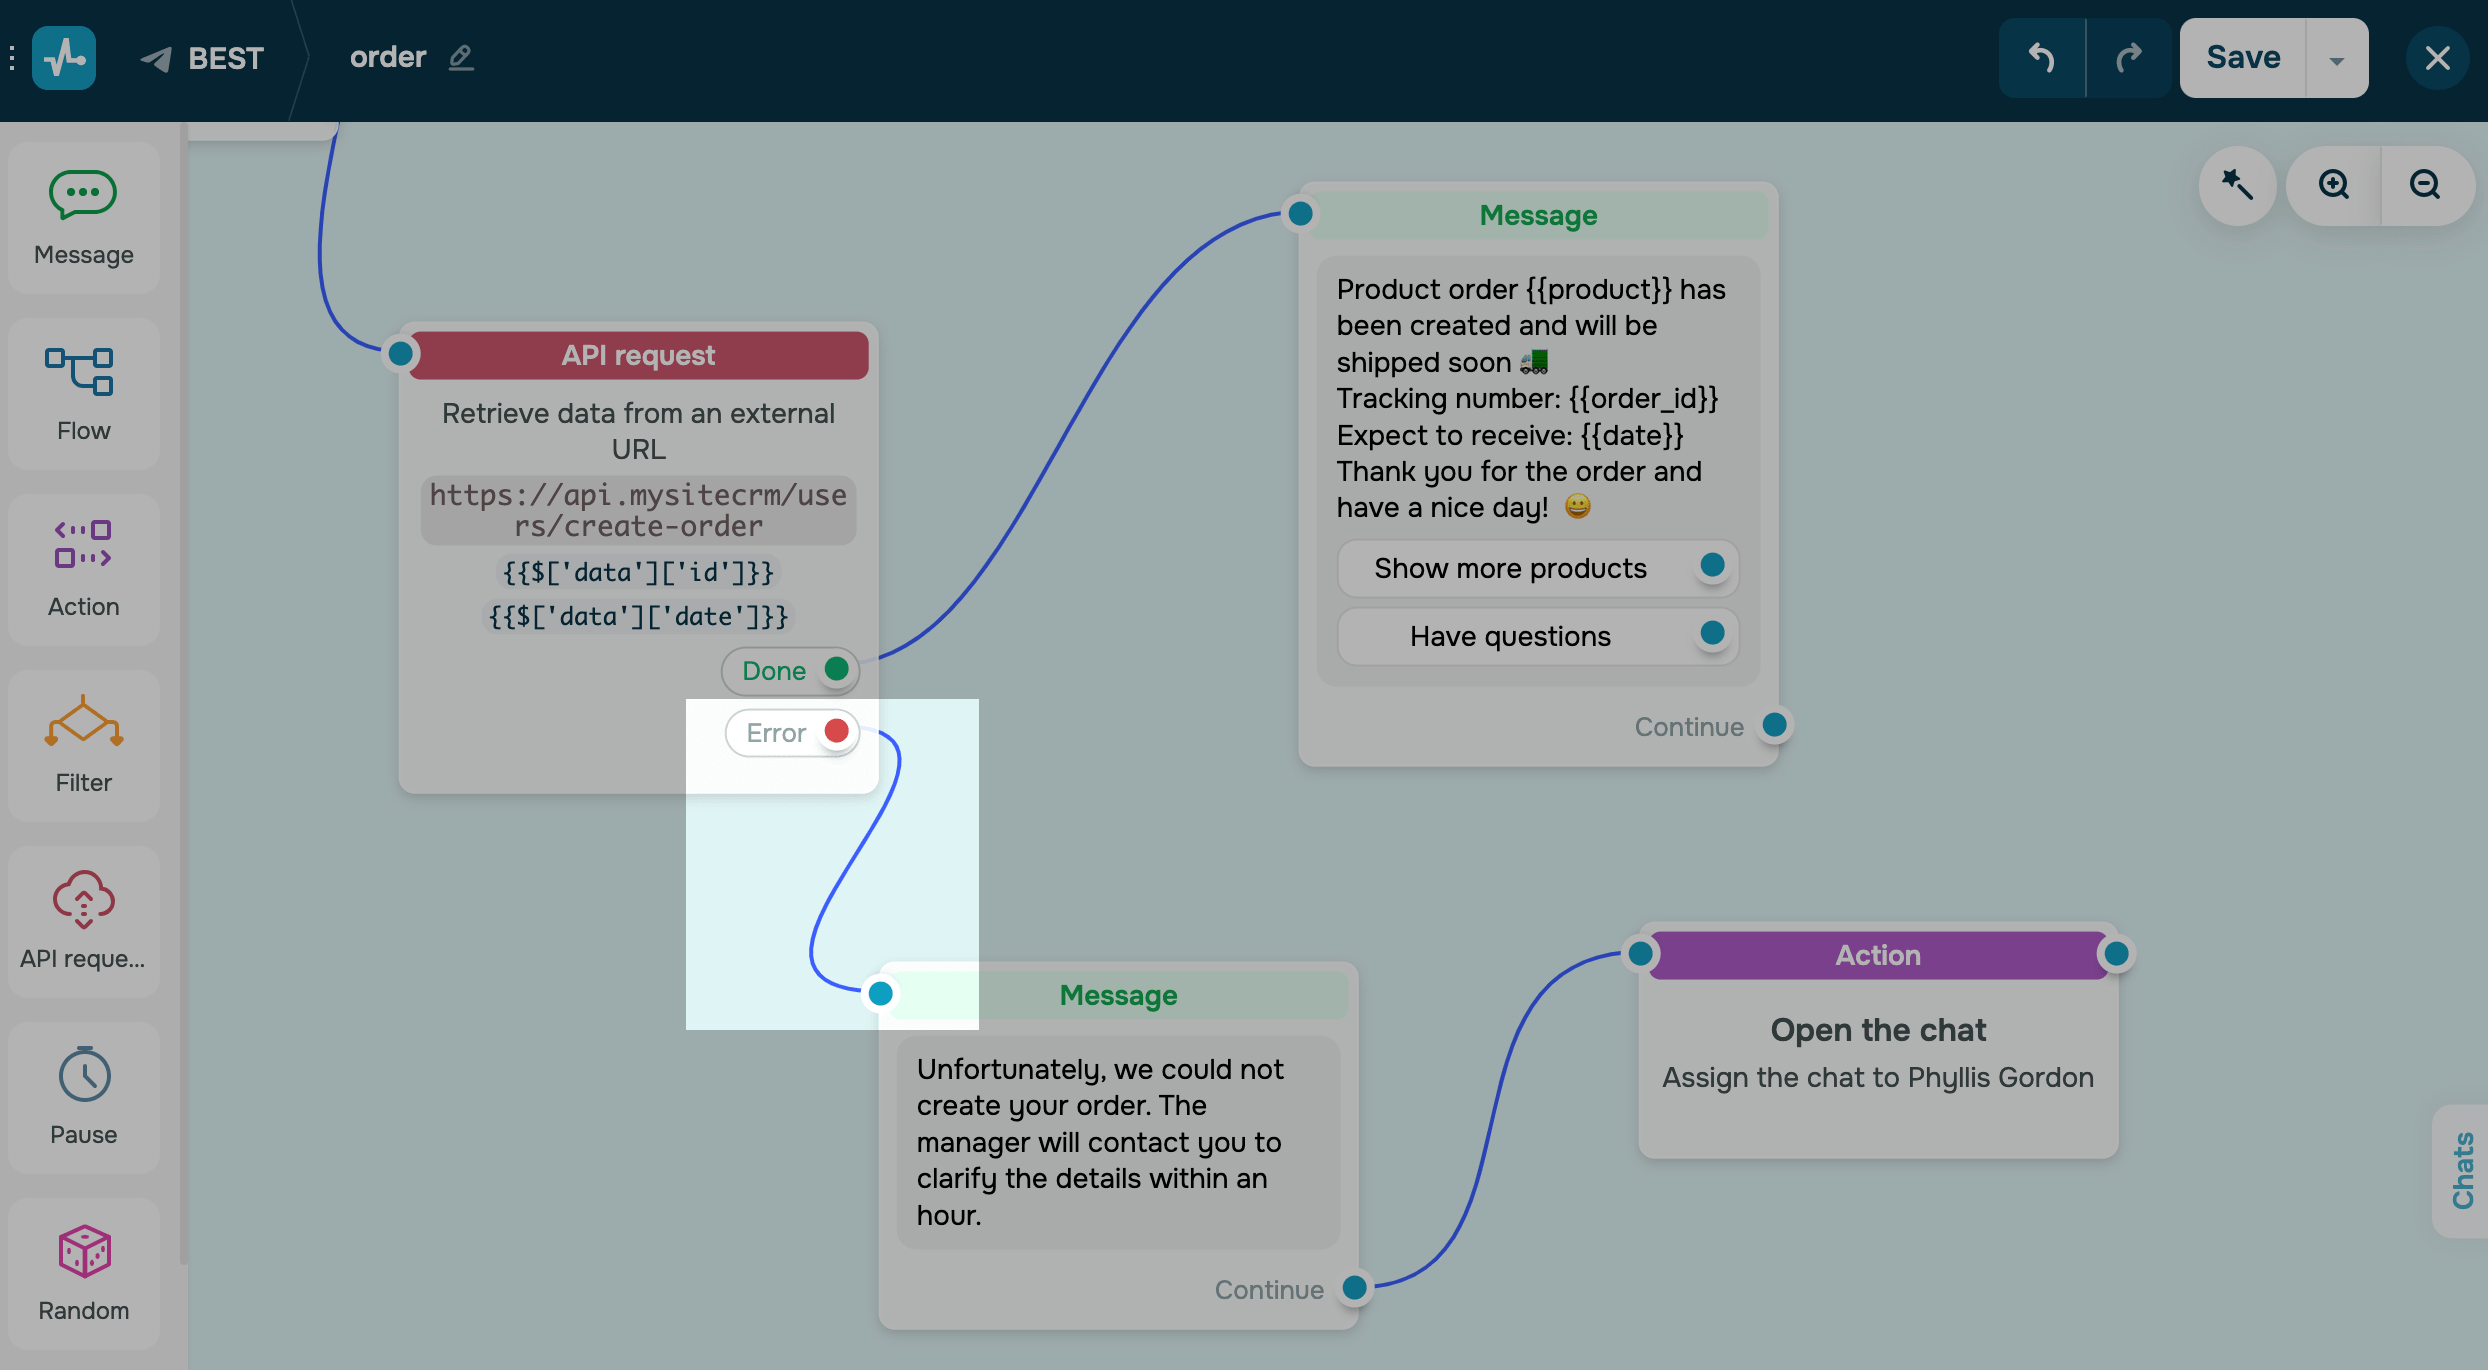
All request responses with the 2xx status will go to the “Done” branch. Request responses with other statuses will go to the “Error” branch, and you cannot use that data. Read more:How to Continue a Flow in Case of a Request Error.
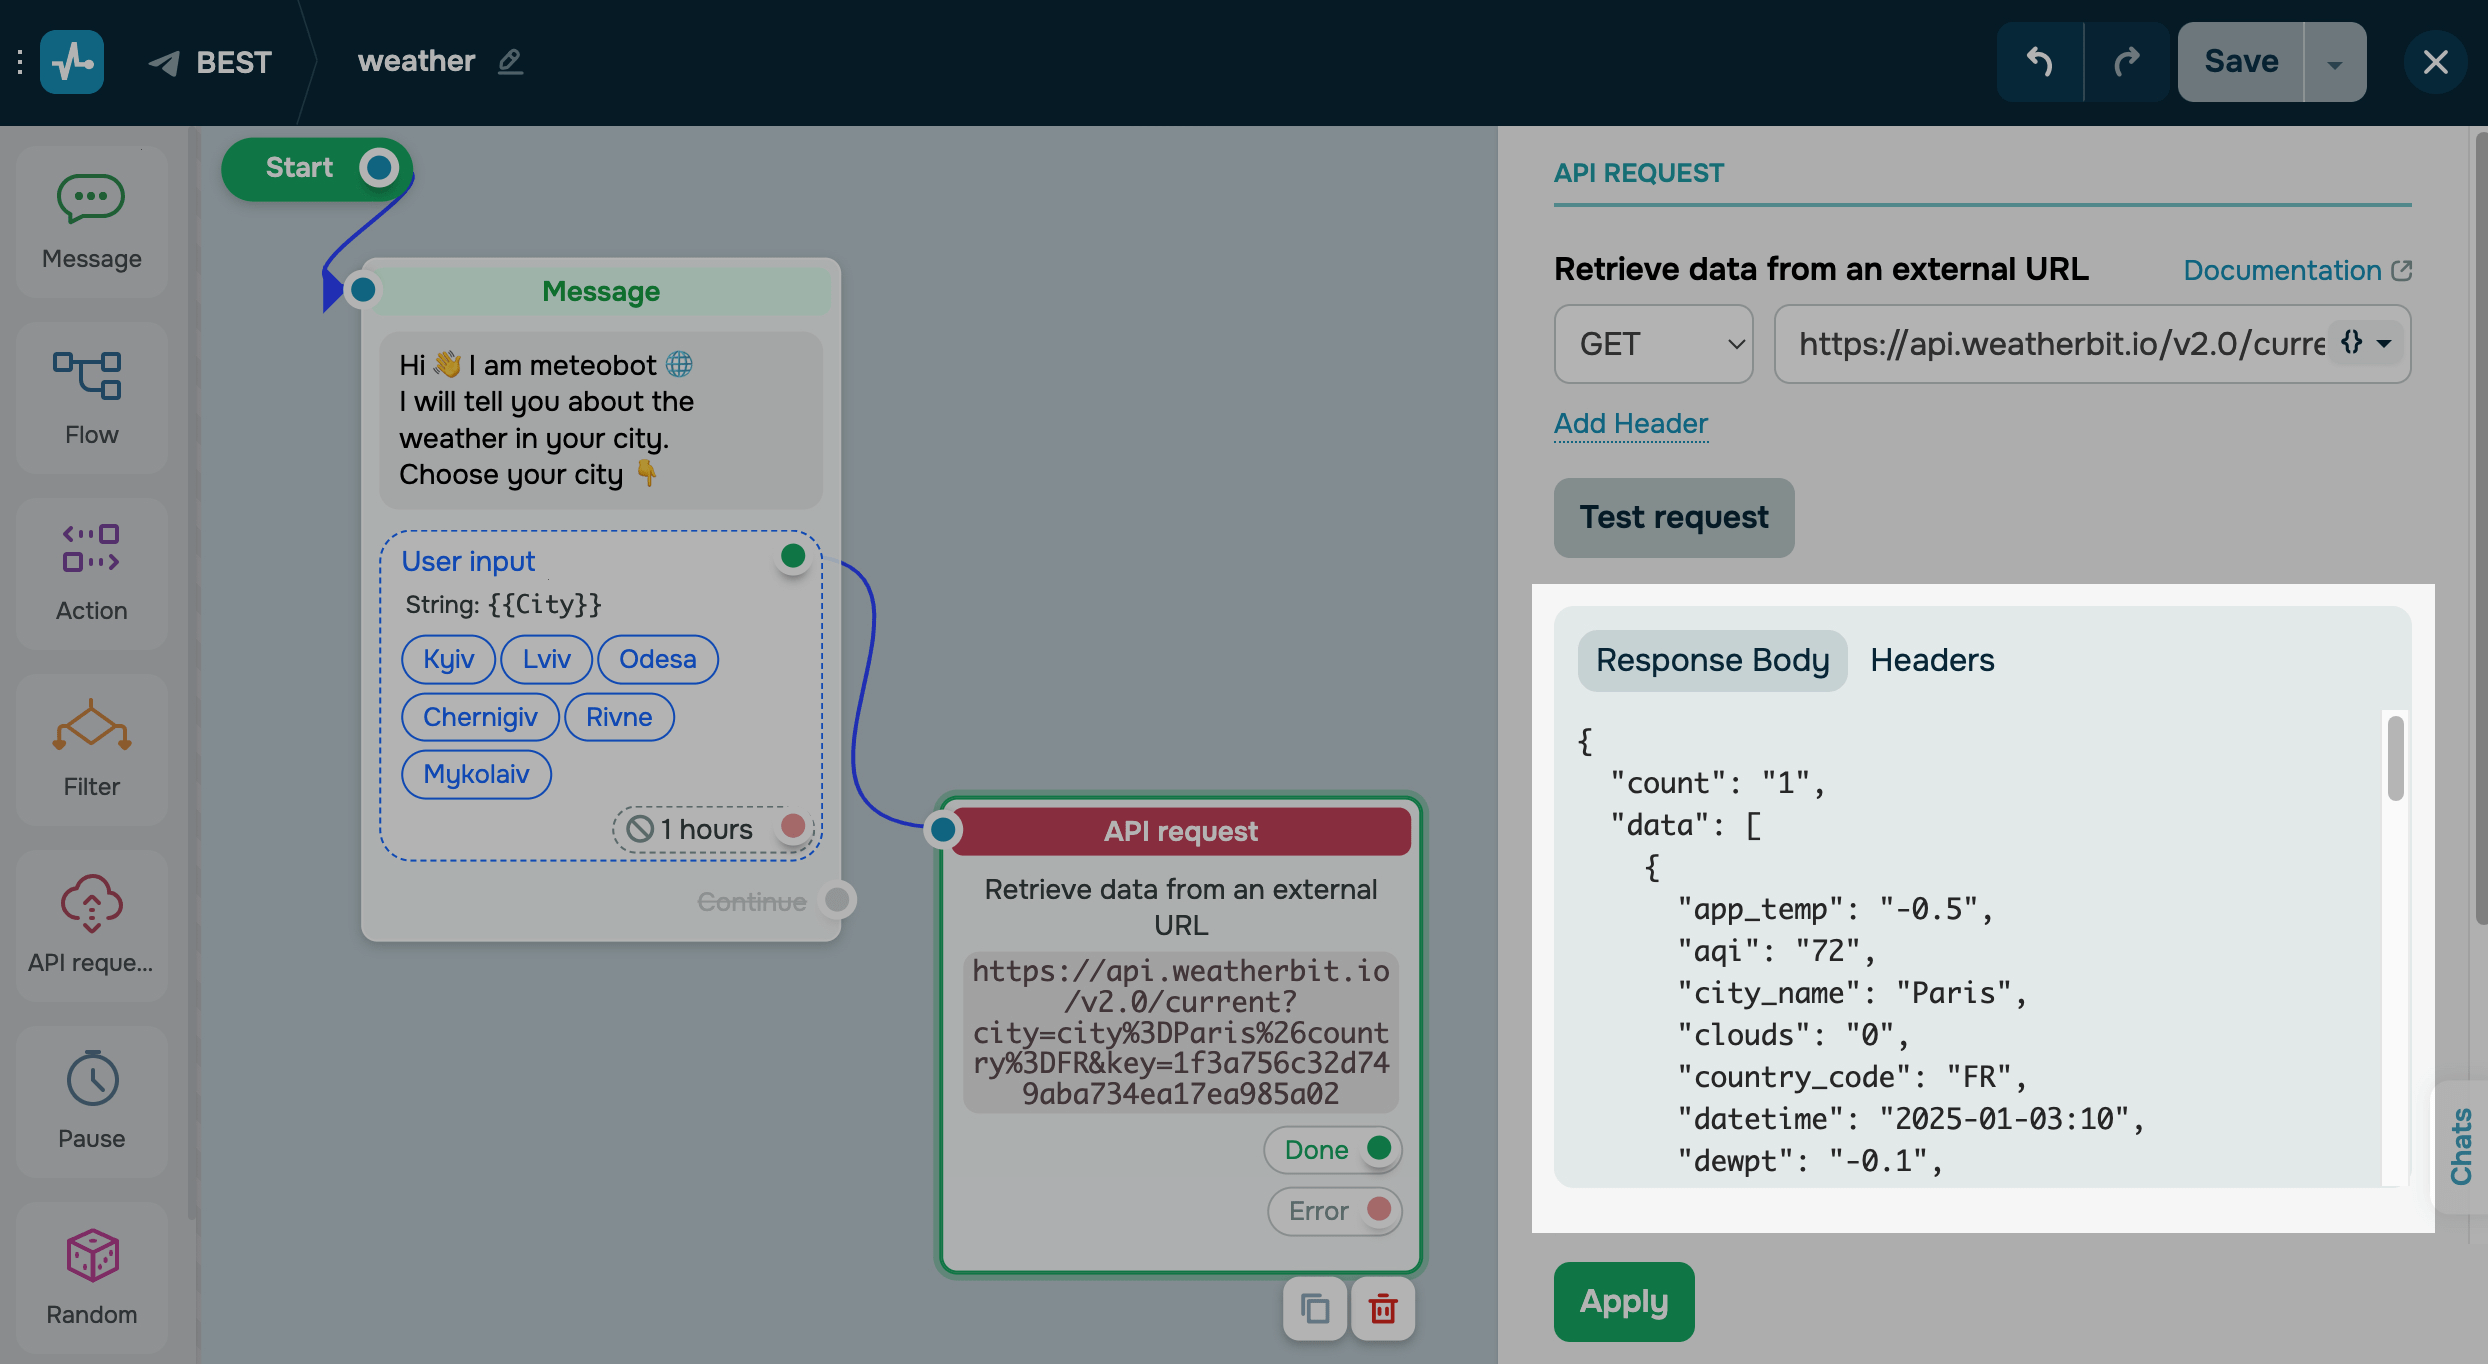
You can use the received data in the next element, save it to a chatbot variable for repeated use, or send a list of messages based on the specified array.
Using Data by Saving it to a Variable
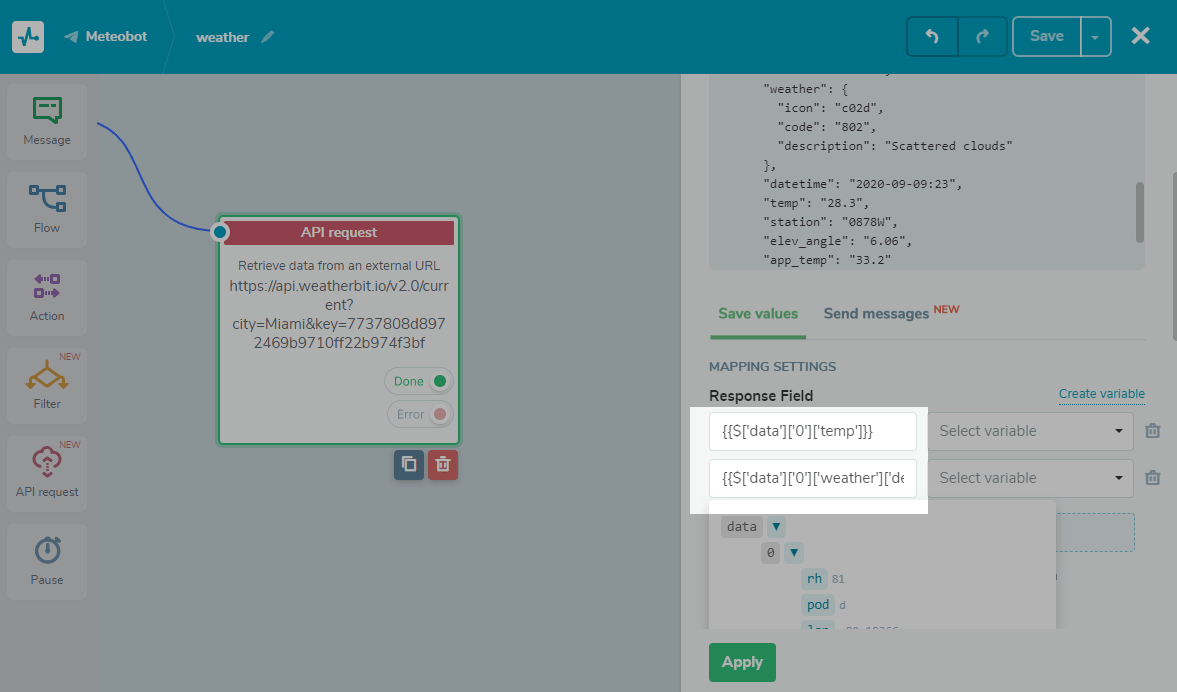
To save the data as variables for future use, in the "API Request" element, go to the “Save values” tab and clickAddin the mapping settings.
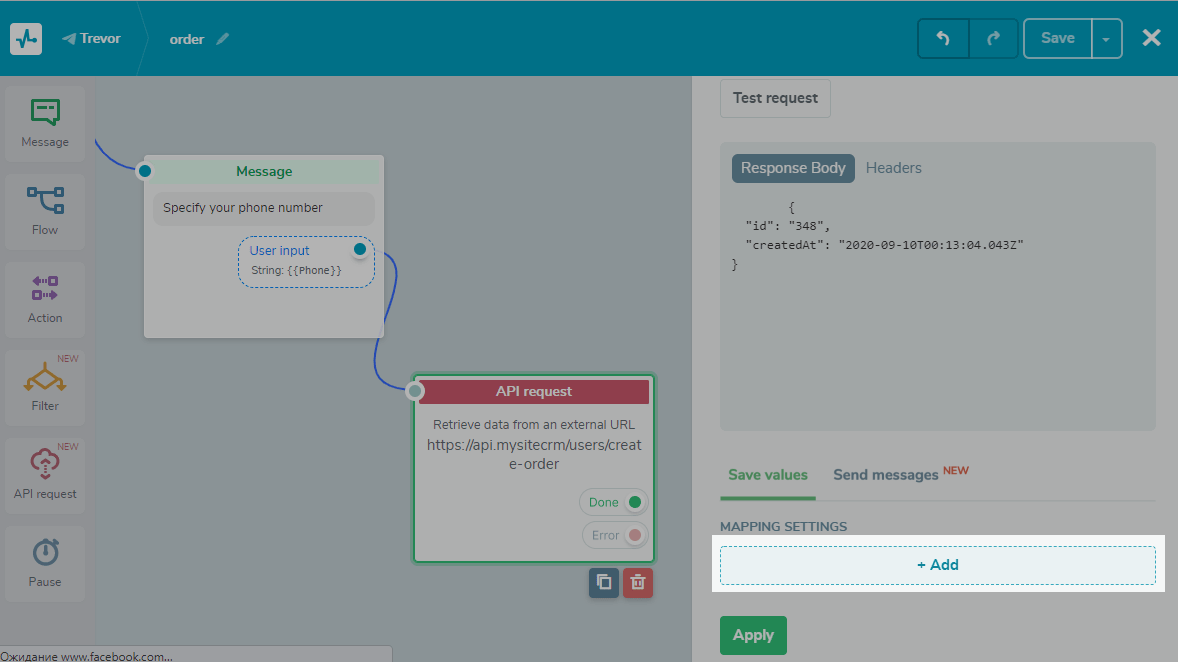
From the response field, select the key whose variable value you want to use.
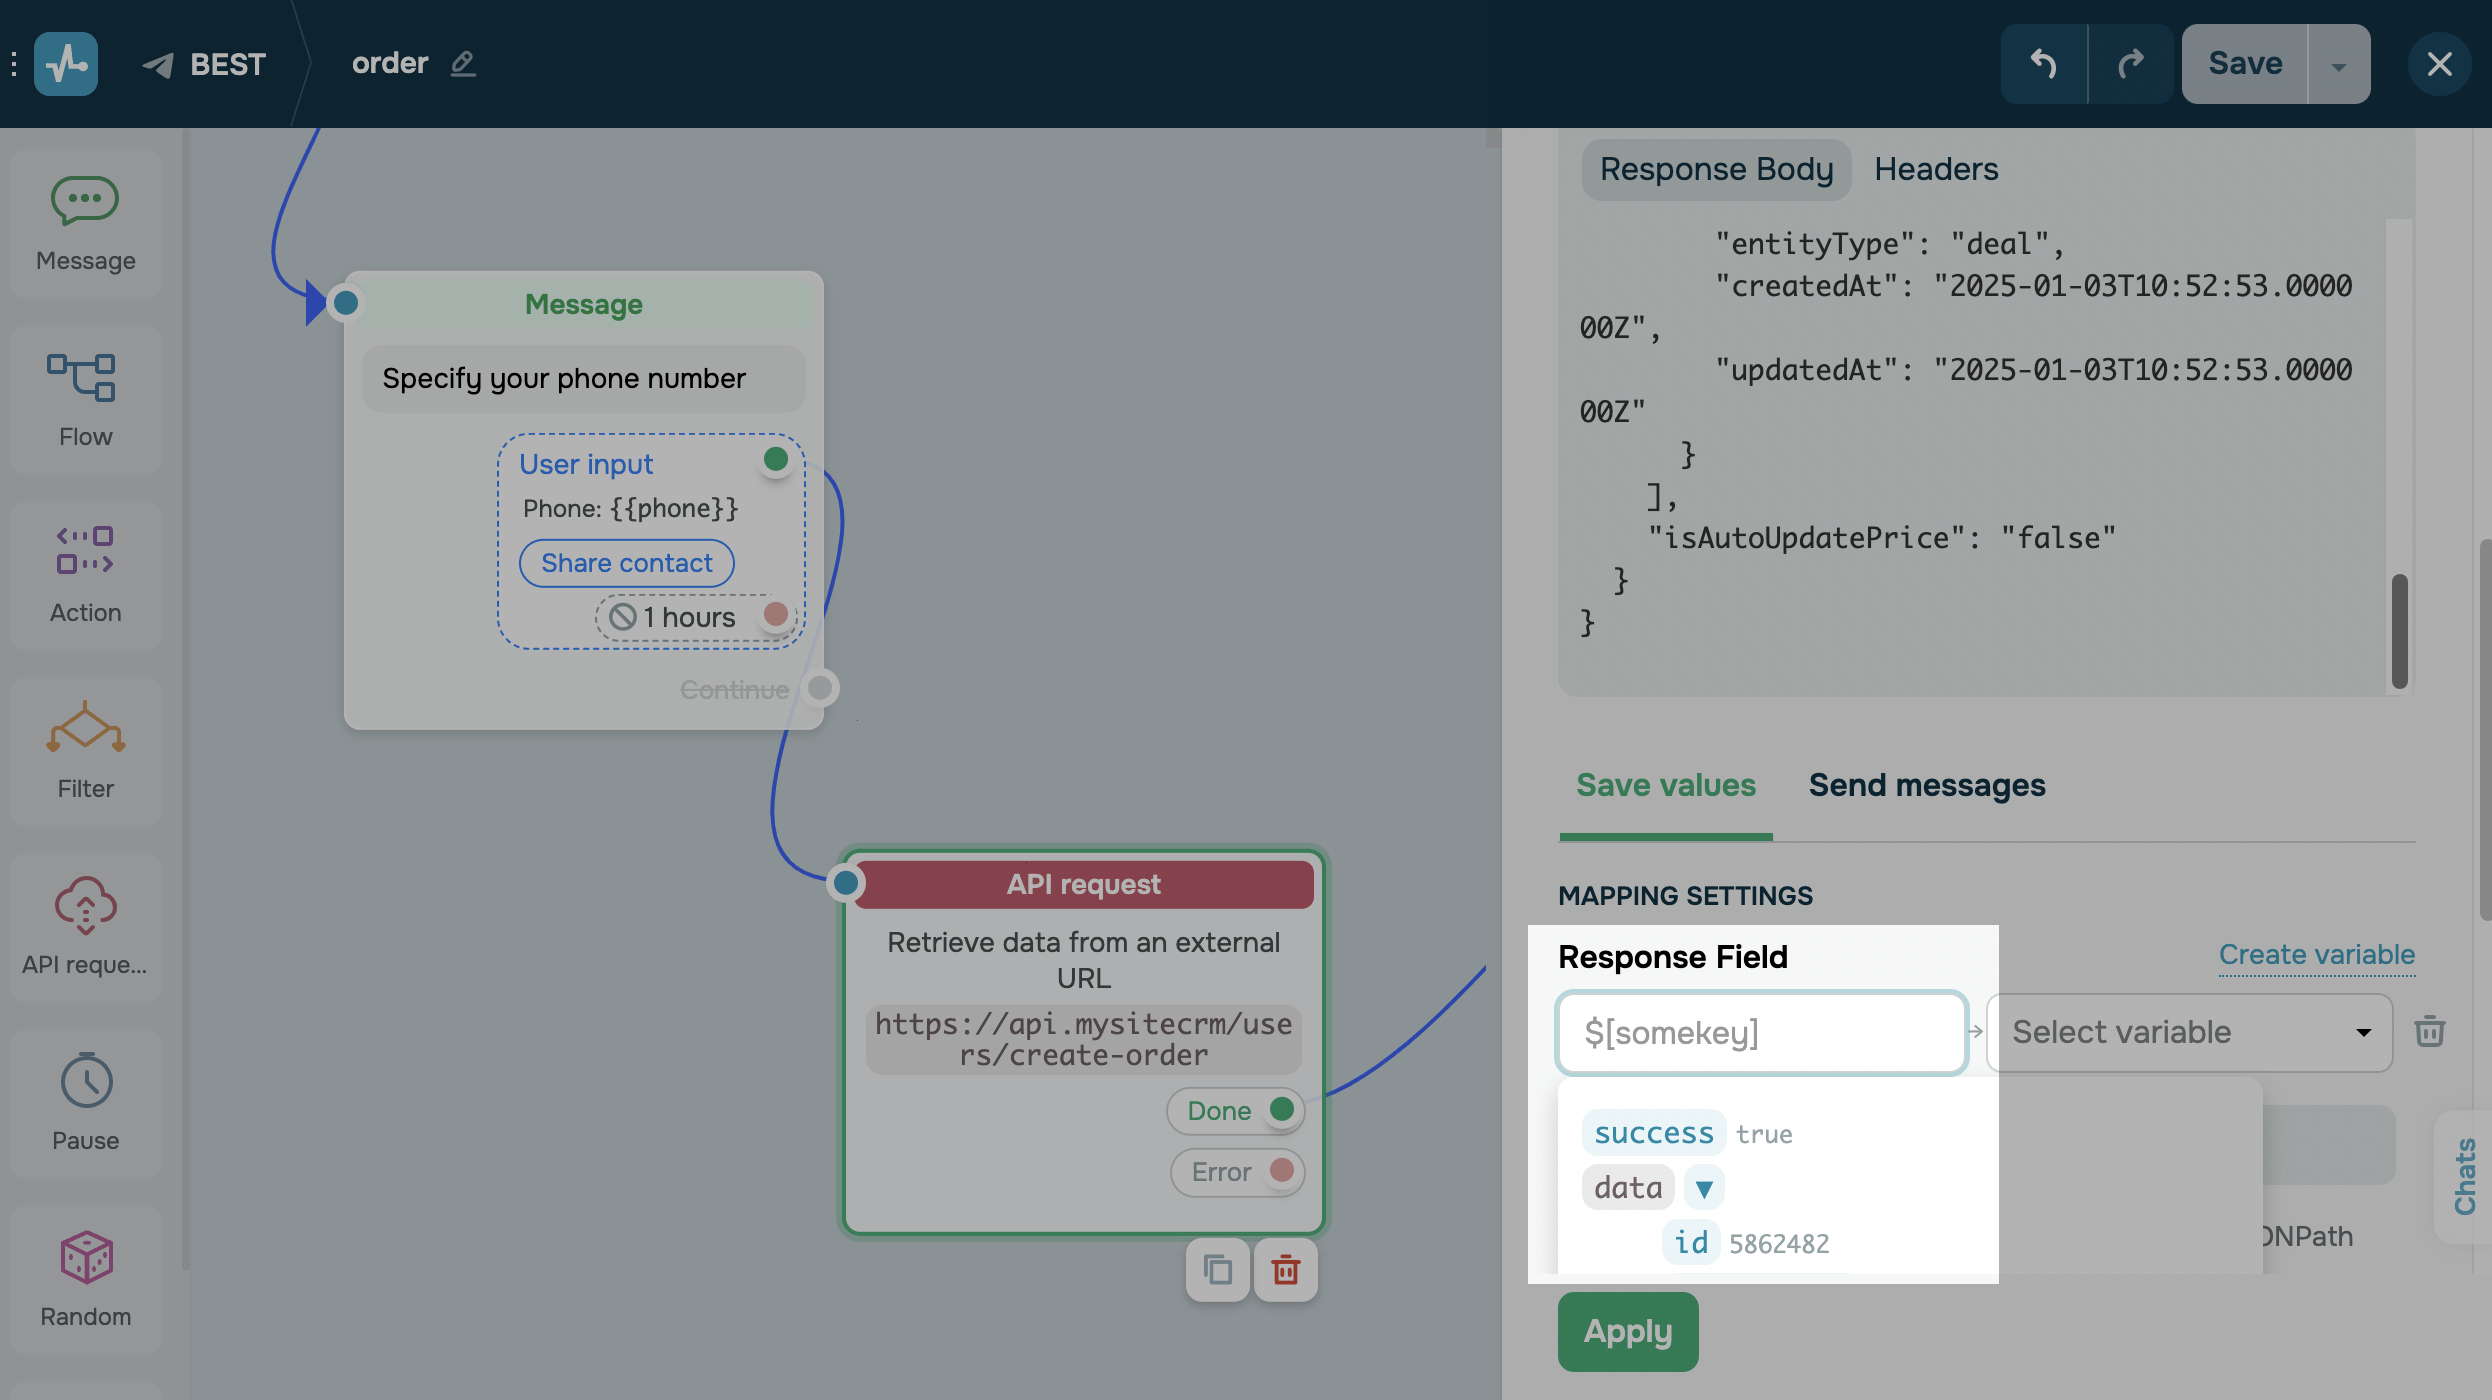
Select the variable to store the value into.
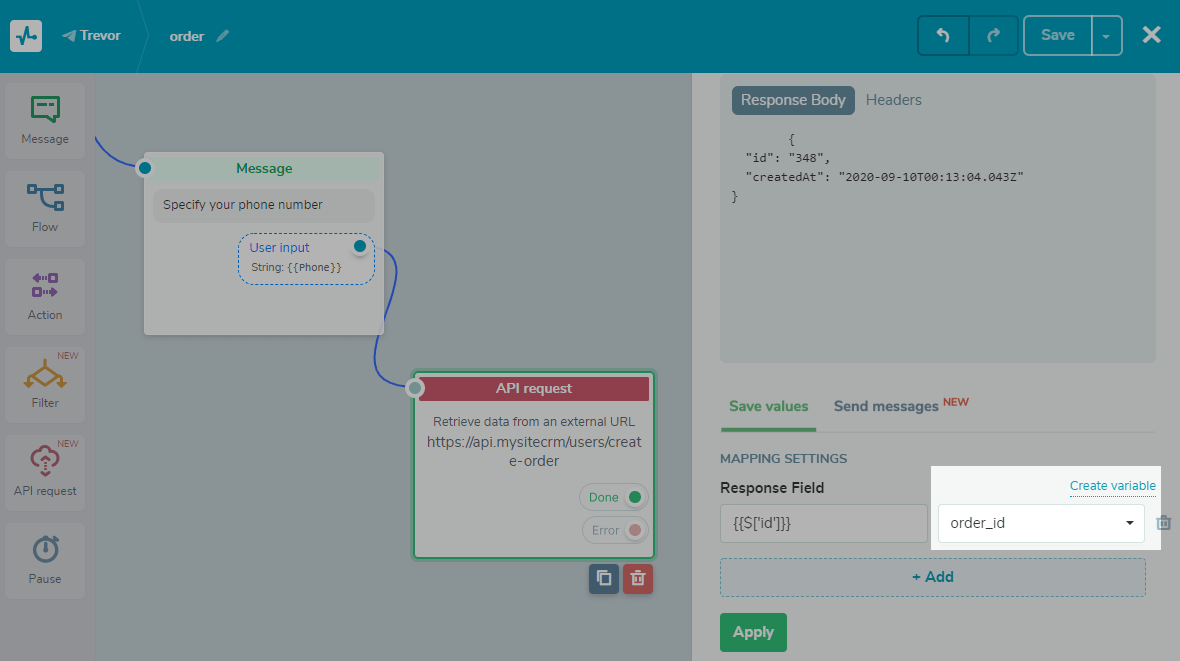
When you have saved the required number of variables, click "Apply" and proceed to create the next element.
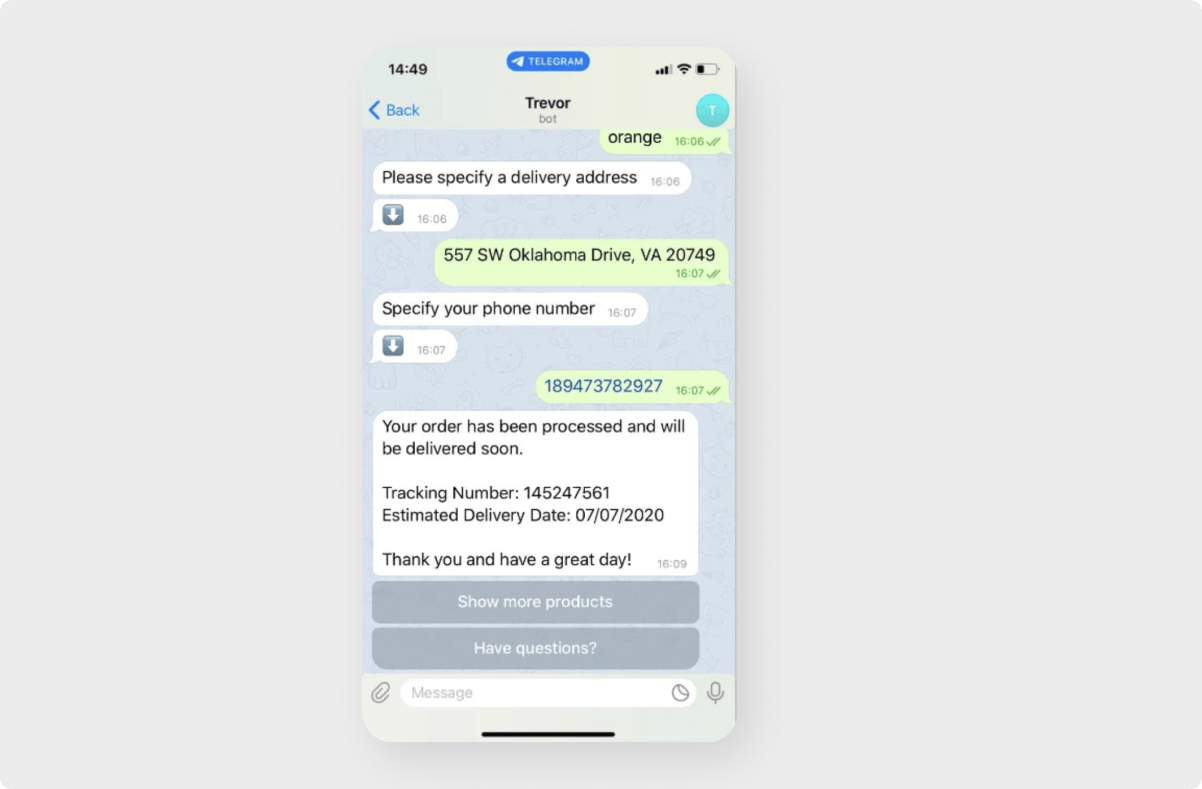
In this example, we created an order, received data from our CRM, saved it as variables, and informed the user to quickly identify the service or product they ordered.
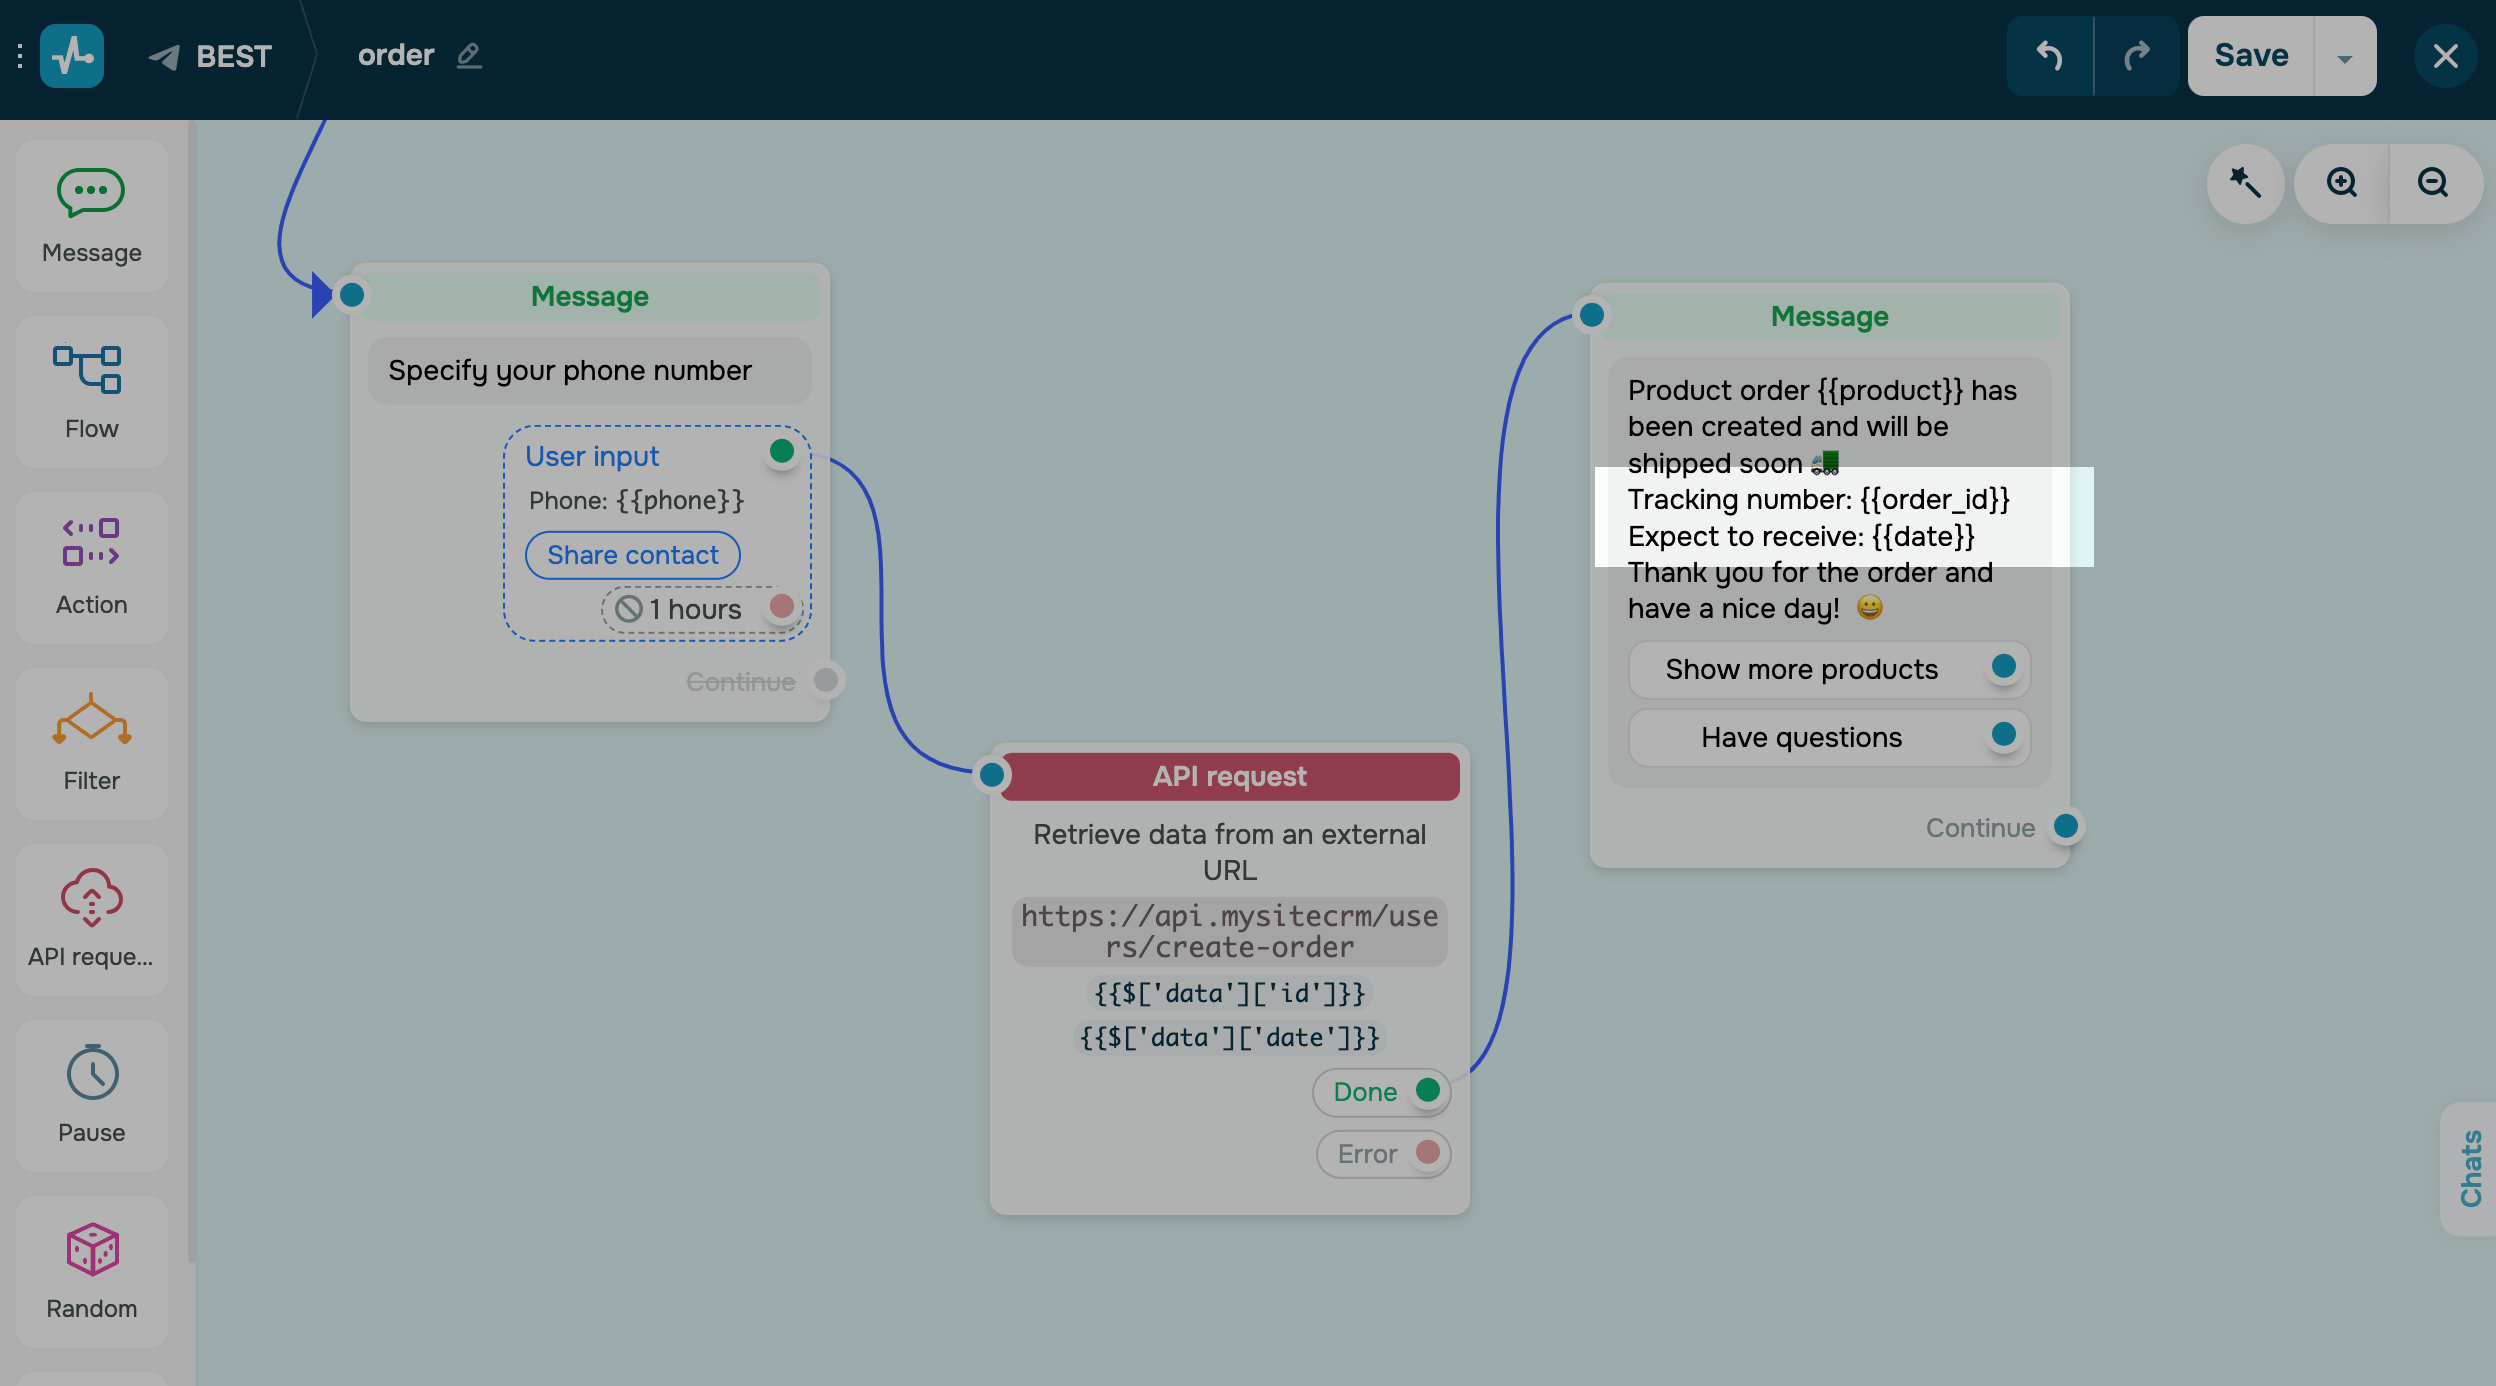
As a user, communicating with your chatbot looks like this:
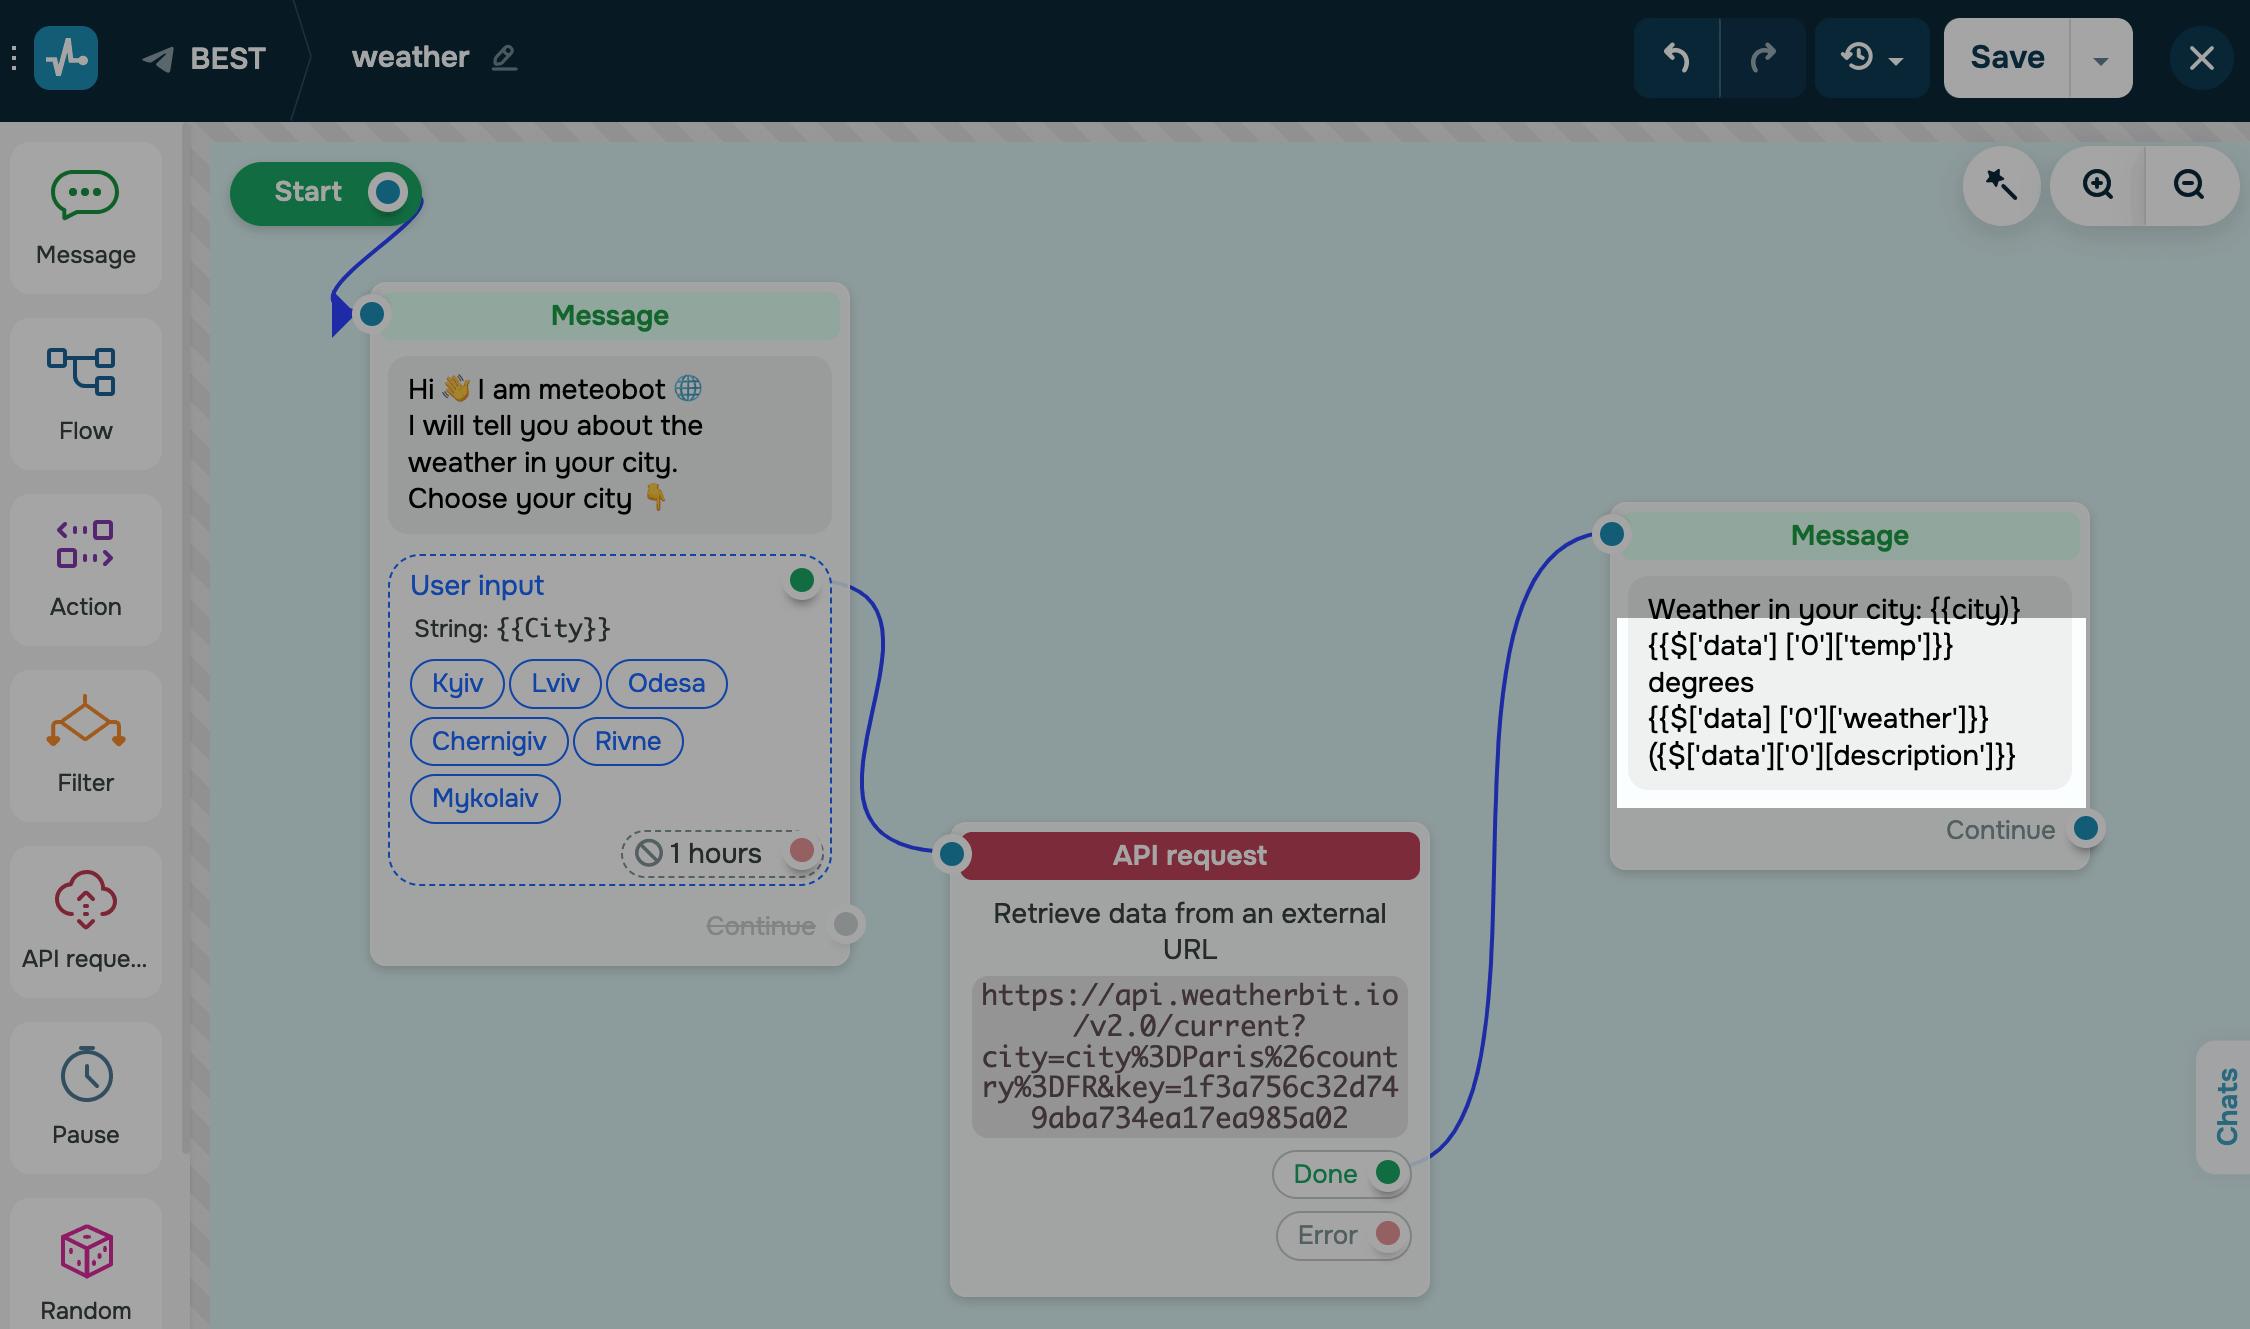
Using data as a JSON Path expression
If you do not need to write data to variables, you can use the received information by inserting aJSON path expression of the structure.
为此,请求和receivi后检查ng a successful response, click "Add", find your variable and copy the JSON Path from the response field.
Then click “Apply” and proceed to create the next item.
Data that you are not writing can only be used once in the next text block.
In the text message, add JSON Path{{$ ['somekey'] ['nestedkey']}}.
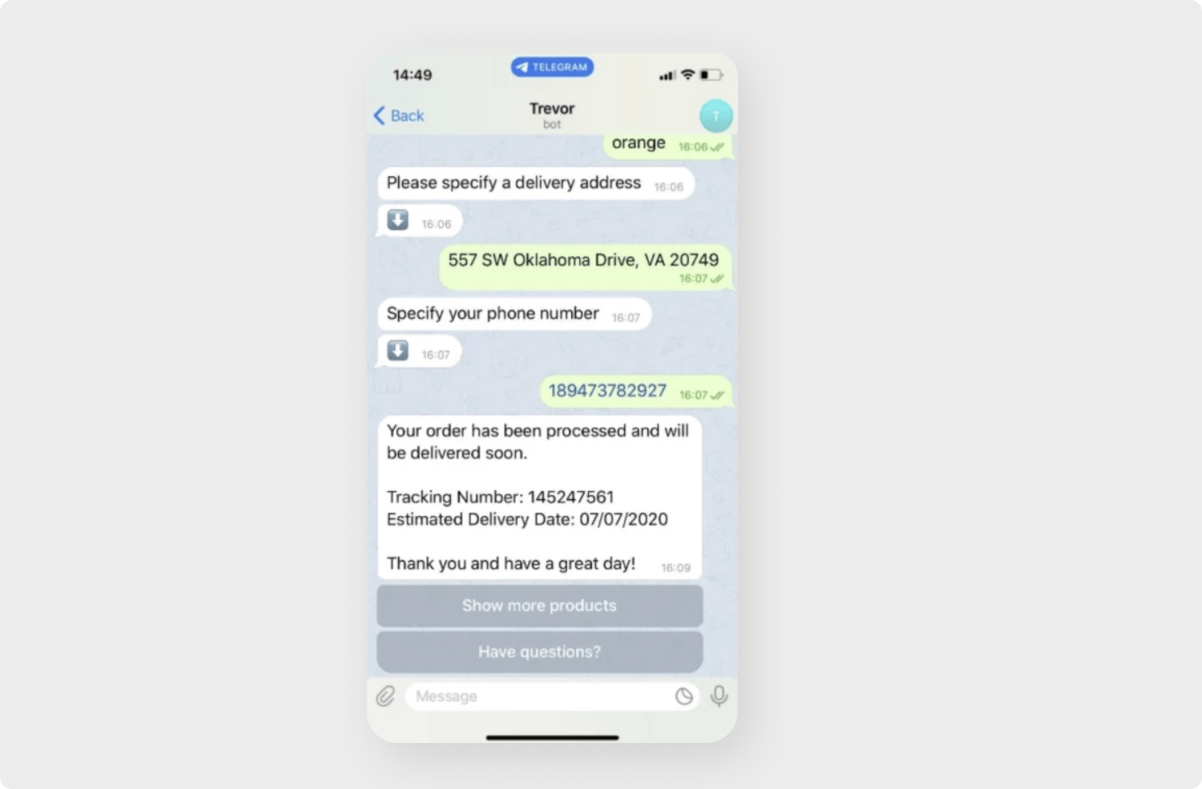
As a user, communicating with your chatbot will look like this:
Using Data for Sending Cards
On apaidpricing plan, you can generate and send cards from the data received in the request response. To do so, use the "Send messages" tab, add a link to your API, and fill in the form fields with the data from the obtained array.
Read more:How to Send Message Cards in Chatbots.

How to Continue a Flow in Case of a Request Error
你还可以分支scenario and, in case of a failed API request, continue your flow using the “Error” branch. For example, you can notify users about an error, request the necessary data again if they do not match, or invite a manager.
Last Updated:15.03.2023
Sign up with
Sign in with Facebook Sign in with Google